Introduction to Dutch Oven Sourdough Bread
The allure of homemade sourdough
There’s something undeniably magical about the experience of baking your own bread. Homemade sourdough captures a warmth and authenticity that store-bought loaves simply can’t match. The chewy crust, fluffy interior, and slightly tangy flavor create a sensory experience that’s hard to resist. Plus, the art of sourdough baking connects you with a centuries-old tradition, allowing you to explore a creative outlet in your busy life.
For young professionals juggling work and personal commitments, the idea of baking bread often seems daunting. However, with a few simple ingredients and the right tools—like a Dutch oven—you can bring this delightful culinary art into your home without sacrificing your precious time. This is where our Dutch Oven Sourdough Bread recipe comes to the rescue!
Why this recipe is a game changer for young professionals
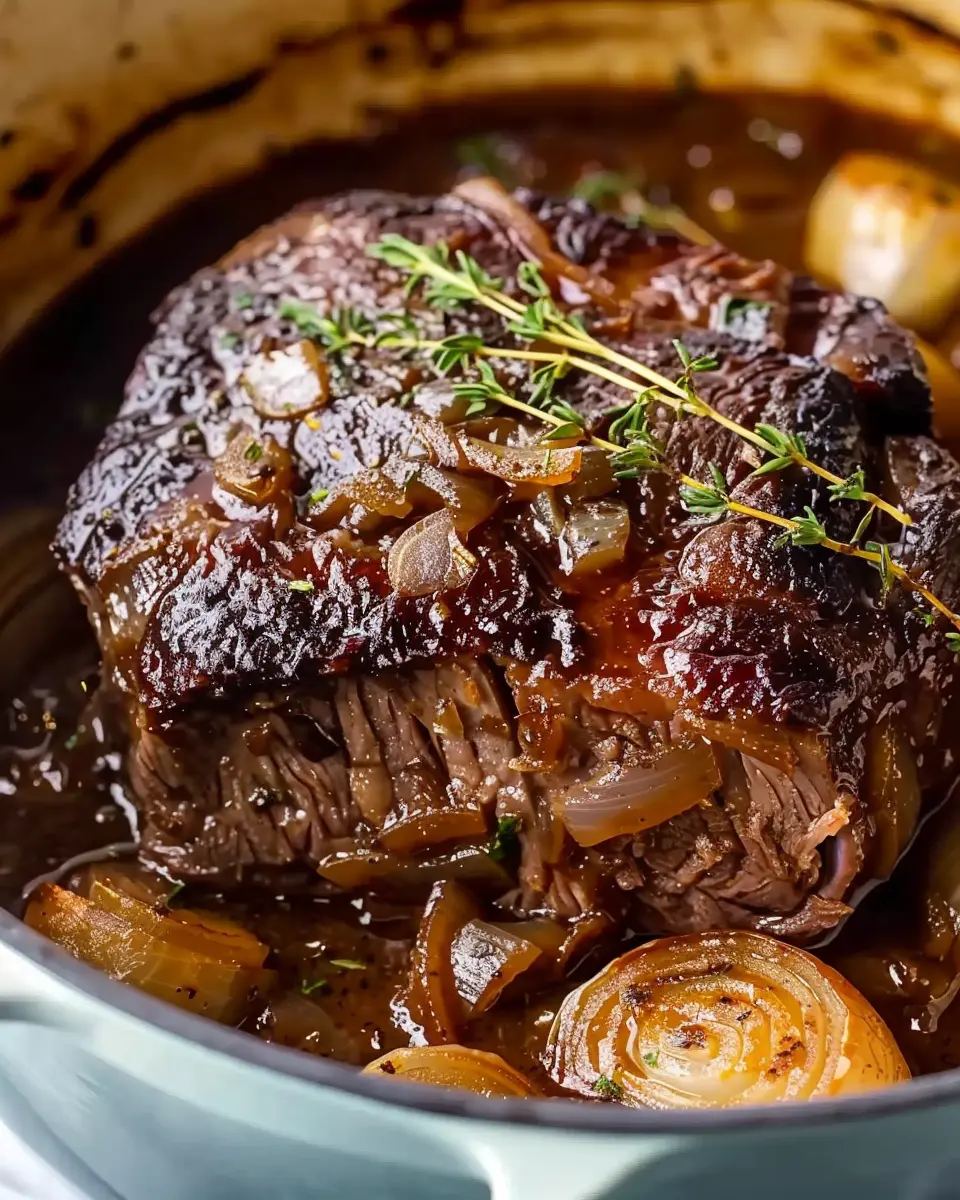
Why choose a Dutch oven for your sourdough? It’s all about achieving that perfect rise and crust. The heavy cast-iron design traps steam, creating an ideal baking environment. This method helps yield a crispy crust while keeping the inside perfectly moist—a combination most home bakers dream of!
This recipe is designed with the young professional in mind:
- Ease of preparation: The ingredients are minimal—just flour, water, salt, and a sourdough starter. You won’t need rare spices or complicated techniques.
- Time-effective: Most of the time is hands-off, allowing you to mix, knead, and let the dough rise while you tackle other tasks. You can effortlessly fit this into your weekend schedule.
Additionally, making your own sourdough bread can cut costs significantly compared to buying artisan loaves. With inflation affecting grocery prices, baking at home has become not just a luxury, but a smart financial choice.
If you’re looking to elevate your bread game and invigorate your culinary skills, join the ranks of home bakers who swear by Dutch Oven Sourdough Bread. Ready to embark on this mouthwatering journey? Let’s dive into the recipe!
For more tips on bread making, check out The Perfect Loaf and King Arthur Baking.
Ingredients for Dutch Oven Sourdough Bread
Essential ingredients for a perfect boule
Making a delightful Dutch Oven Sourdough Bread at home requires just a handful of quality ingredients. Here’s what you’ll need to craft that golden, crusty loaf you’ve been dreaming of:
- Flour: Aim for high-protein bread flour, as it provides the necessary gluten structure. Some folks also mix in whole wheat for added flavor.
- Water: Use filtered or bottled water to minimize chlorine, which could hinder yeast activity.
- Sourdough starter: This is your magic potion! A well-fed starter ensures the right amount of yeast and bacteria for fermentation.
- Salt: Essential for flavor and controlling fermentation, use fine sea salt for the best results.
The importance of quality flour and starter
Investing in quality ingredients makes all the difference. For flour, consider sourcing from local mills or choosing organic options. This not only supports small businesses but often results in fresher ingredients with superior flavor and nutrition.
Your sourdough starter, on the other hand, is the heart of your bread. If you’re short on time, purchasing a well-maintained starter from a reputable source (like King Arthur Baking) guarantees consistent results. Have you thought about nurturing your own starter? It can be a fun and rewarding journey!
By starting with quality ingredients, you’re laying a strong foundation for amazing Dutch Oven Sourdough Bread. Ready to get baking?
Preparing Dutch Oven Sourdough Bread
Baking Dutch Oven Sourdough Bread is not just about mixing flour and water; it’s an art form that requires the right tools, patience, and a bit of love. Whether you’re a novice baker or looking to sharpen your skills, this step-by-step guide will lead you through the process of creating that crusty, chewy, and utterly delightful sourdough bread in the comfort of your own kitchen.
Gather your tools and ingredients
Before diving into the delightful world of sourdough, it’s essential to gather your tools and ingredients. Here’s what you’ll need:
Equipment:
- A large mixing bowl
- A Dutch oven (cast iron works best)
- A bench scraper
- A kitchen scale (for precision)
- A dough scraper or spatula
- A kitchen towel or plastic wrap for covering
Ingredients:
- 500 g of bread flour
- 350 g of water (warm, around 85°F)
- 100 g of active sourdough starter (at peak activity)
- 10 g of salt
By ensuring you have everything ready, you can focus on the process and enjoy the experience. For more tips on essential baking tools, check out resources from King Arthur Baking.
Mixing the dough (the magic begins)
The first step is where the magic starts — mixing your ingredients. In a large bowl, combine the bread flour and salt. Once mixed, add your active sourdough starter and warm water. Mix it all together until there are no dry flour pockets left. The dough will be shaggy, which is perfectly normal.
Let it sit for about 30 minutes to allow the ingredients to hydrate. This resting period, known as autolyse, is crucial as it improves the dough’s structure and flavor.
The art of stretch and fold
After the autolyse phase, it’s time to give your dough some love through the stretch and fold technique. Wet your hands to prevent sticking, then grab one edge of the dough, stretch it upward, and fold it over onto itself. Rotate the bowl a quarter turn and repeat this process until you’ve done it four times, covering all sides.
Perform this stretch and fold every 30 minutes for about two hours. This technique builds strength in the dough, resulting in a beautiful rise and crumb structure.
Pre-shaping and final shaping the dough
Once your dough has risen satisfactorily, it’s time to shape it. Lightly flour your work surface and gently turn your dough out. For pre-shaping, form it into a loose round by folding the edges into the center and then flipping it seam-side down. Cover it with a kitchen towel and let it rest for about 20 to 30 minutes.
After resting, it’s time for final shaping. Tuck the sides in and tighten the surface by gently pulling it towards you. This creates surface tension, vital for a great rise.
Proofing overnight (patience is key)
Place your beautifully shaped dough into a floured banneton or bowl lined with a floured kitchen towel. Cover it well and let it proof overnight in the refrigerator. This slow fermentation enhances the flavor and makes scoring easier when you bake.
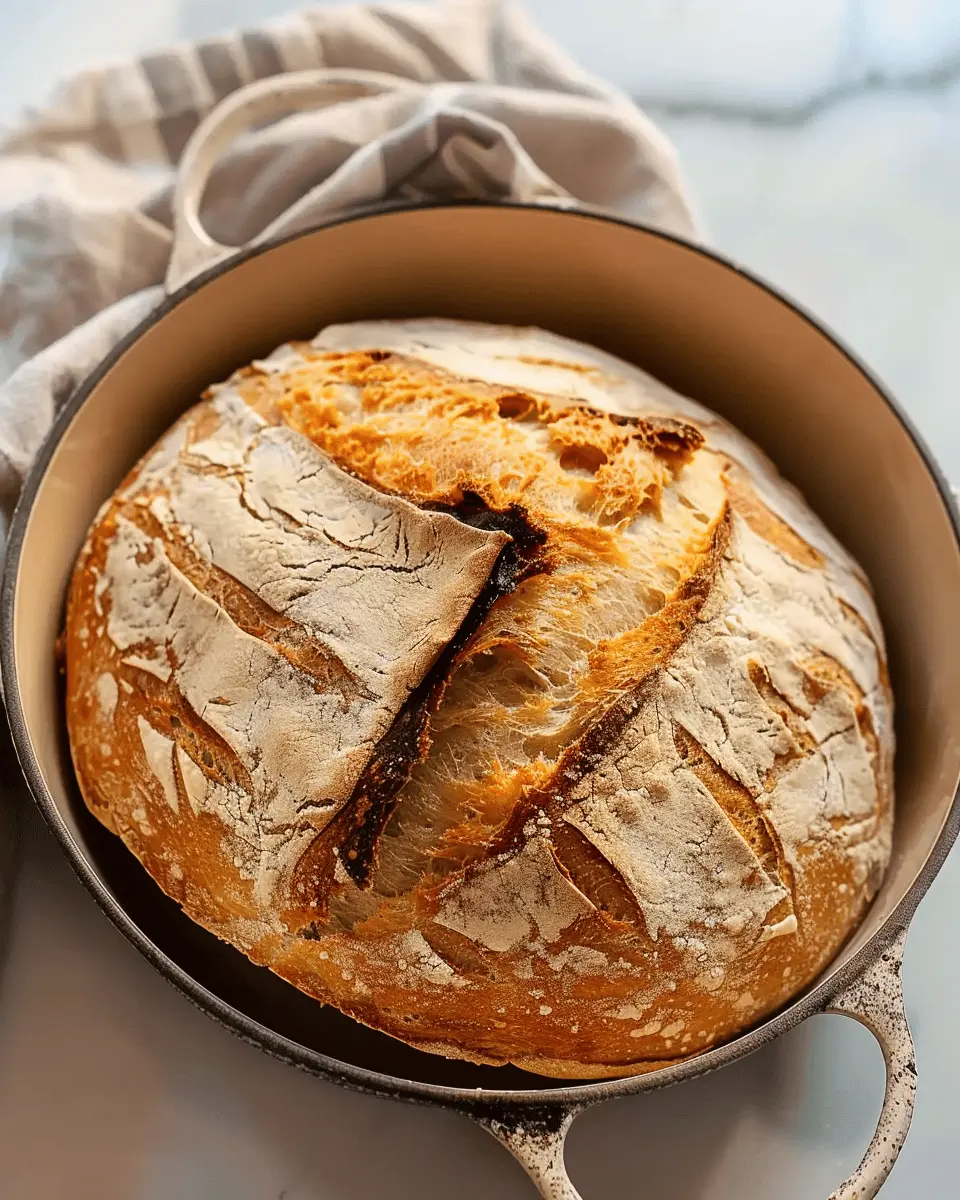
Preheating the Dutch oven and baking
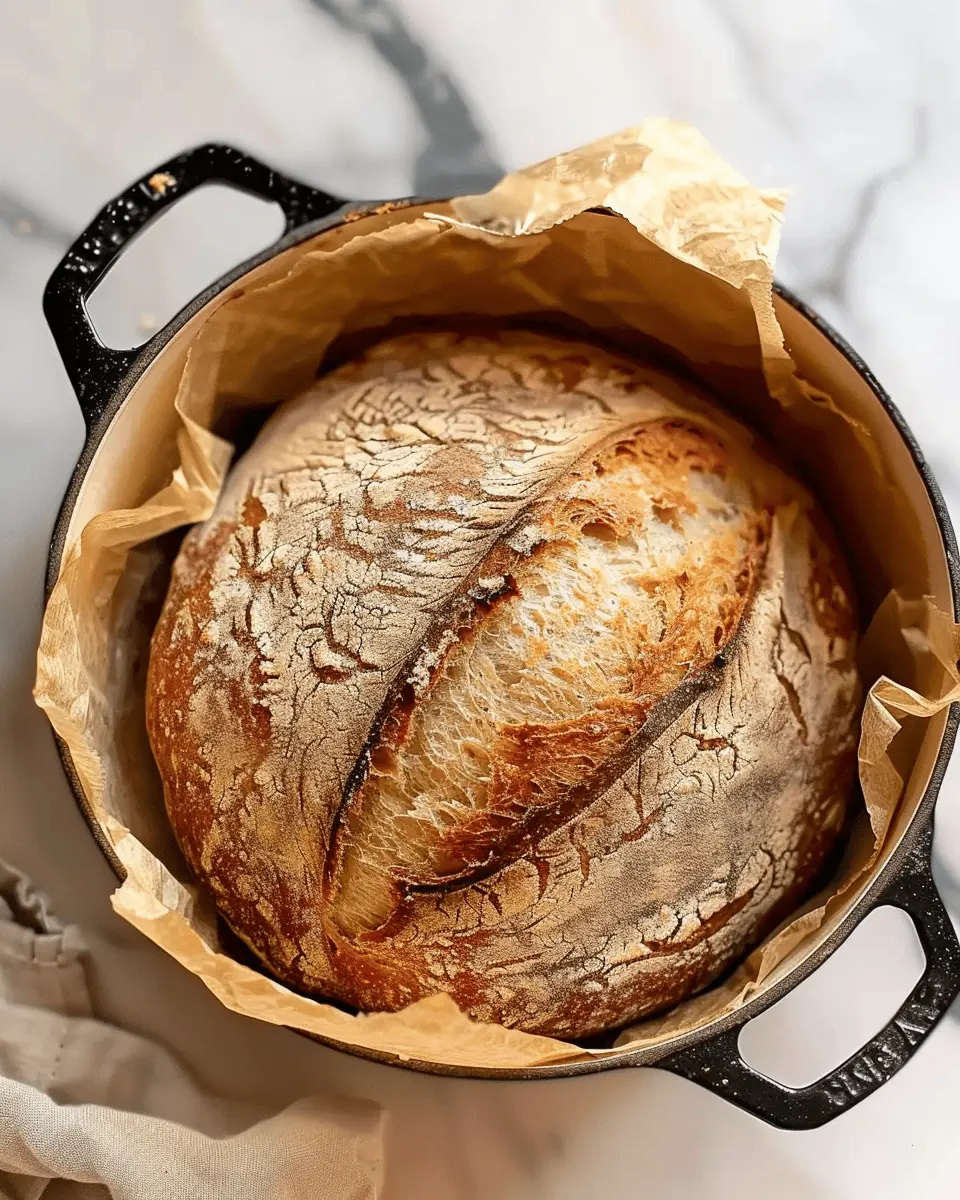
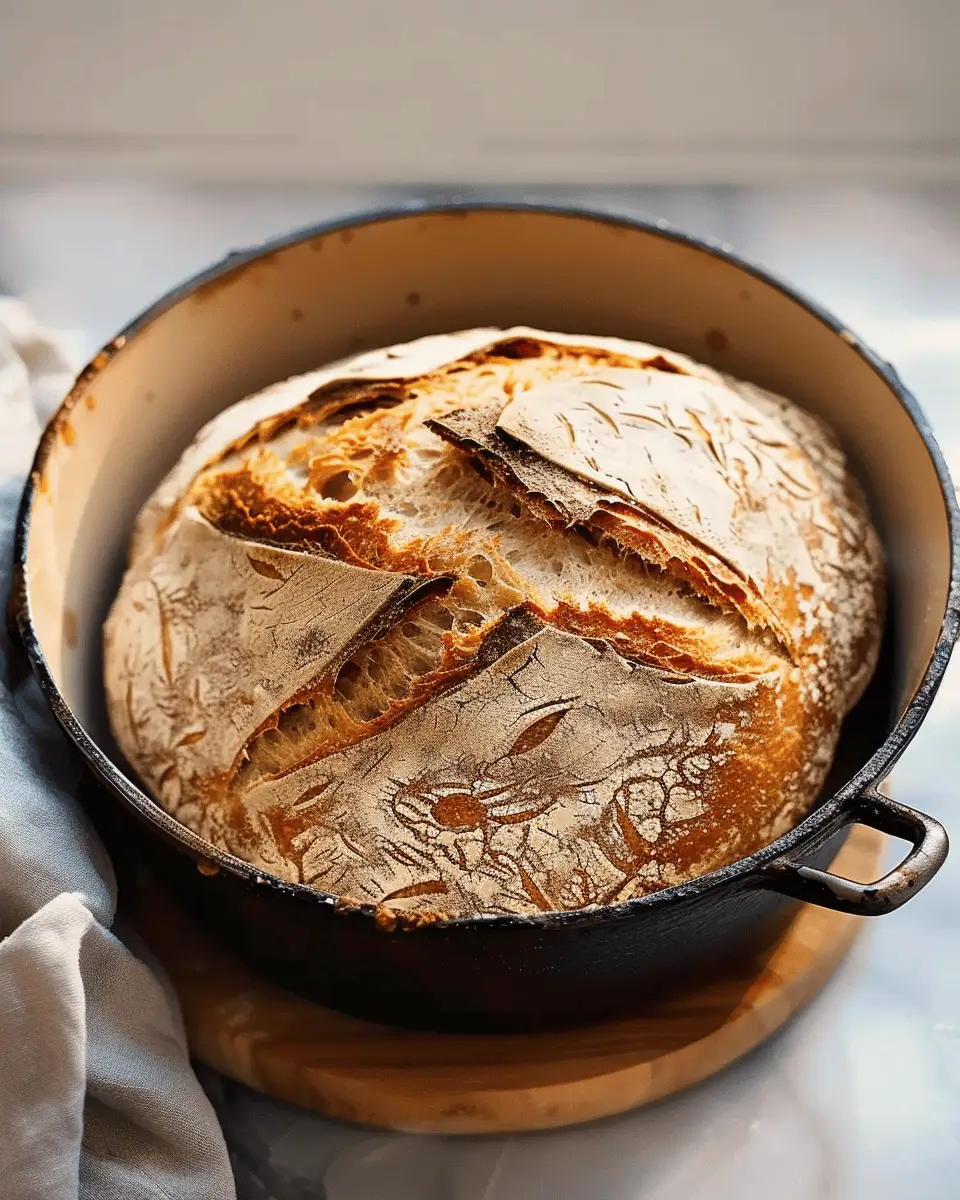
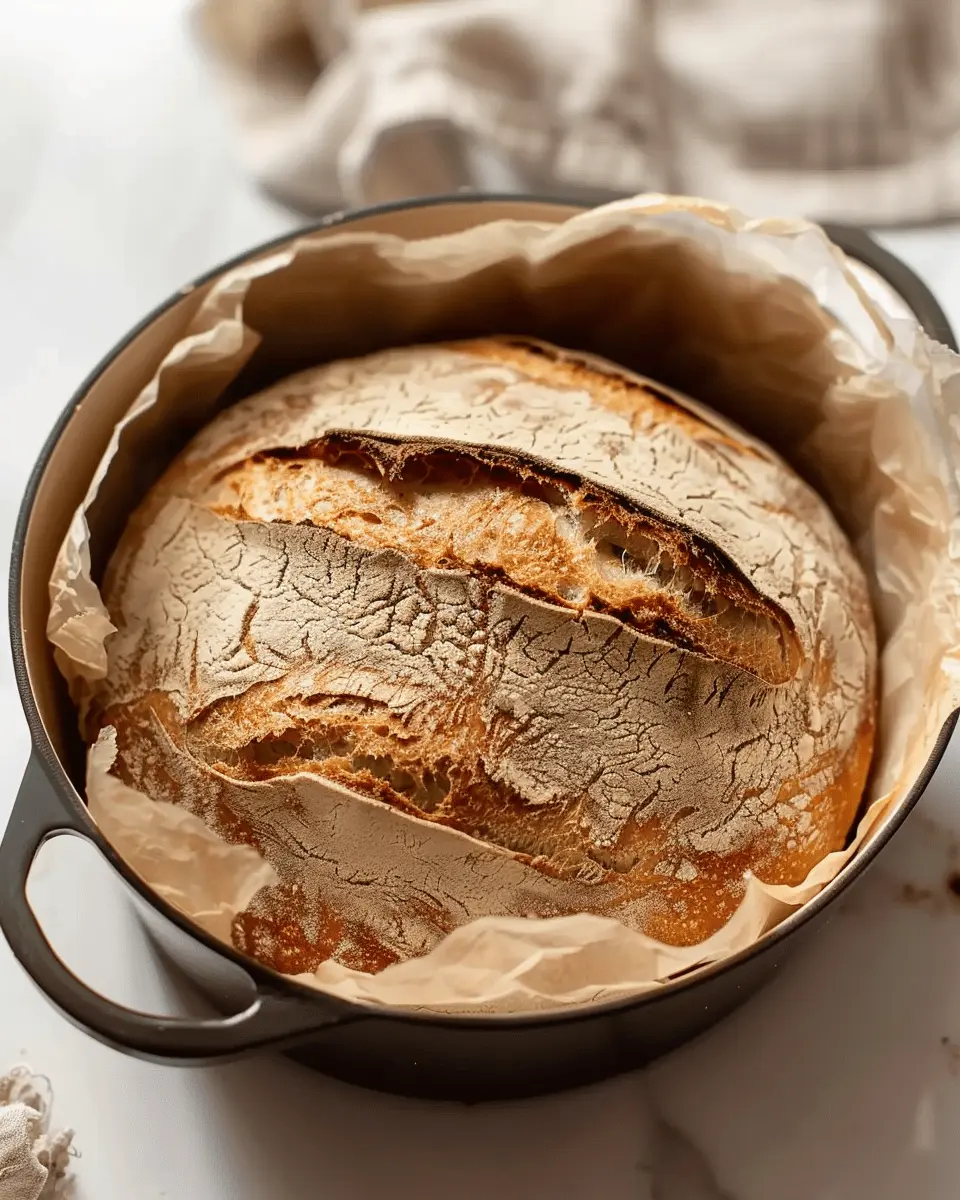
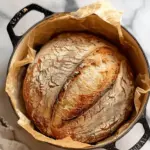
The next day, about an hour before baking, remove your dough from the fridge and let it come to room temperature. Preheat your oven to 450°F (232°C) with your Dutch oven inside. The goal here is a hot, steamy environment that aids in achieving that coveted crust.
Once preheated, carefully remove the Dutch oven and transfer your dough in. Don’t forget to score the surface with a sharp knife or lame to allow the bread to expand while baking. Cover it with the lid and bake for 30 minutes. After that, remove the lid and bake for an additional 15-20 minutes until golden brown.
Enjoy the mesmerizing aroma as your Dutch Oven Sourdough Bread bakes to perfection. Don’t rush the cooling process; let it rest for at least an hour before slicing.
With these steps, you’ll be well on your way to becoming a proud sourdough baker! For more detailed recipes or tips, visit reputable baking resources like The Bread Ahead Bakery for inspiration. Happy baking!
Variations on Dutch Oven Sourdough Bread
Adding herbs and seeds for flavor
One of the joys of making Dutch Oven Sourdough Bread is the opportunity to customize it to your taste. Consider adding fresh or dried herbs like rosemary, thyme, or oregano to the dough. These aromatic additions can elevate the flavor profile, bringing a touch of gourmet cooking into your kitchen. For a delightful crunch, sprinkle your favorite seeds—such as sesame, poppy, or flax—on top before baking. They not only enhance flavor but also provide nutritional benefits.
Experimenting with whole grains
If you’re looking to boost the nutritional value of your Dutch Oven Sourdough Bread, why not experiment with whole grains? Incorporating flours like whole wheat, spelt, or rye can offer a different texture and flavor. Just replace about 25% of the all-purpose flour with your chosen whole grain flour to start. This will give you a heartier loaf packed with fiber and complex flavors without losing the delightful sourdough tang.
Incorporating your favorite ingredients
Don’t be afraid to get creative! This is your chance to personalize your sourdough. Chop up some sun-dried tomatoes or olives and fold them into the dough for a Mediterranean twist. Feeling adventurous? Add bits of Turkey Bacon or Chicken Ham for a savory kick. Incorporate nuts, dried fruits, or even cheese—like feta or cheddar—for a sophisticated twist. The possibilities are endless!
For more inspiration on variations, visit sites like King Arthur Baking and Sourdough School. You’re bound to find unique insights that will inspire your own kitchen creations!
Cooking tips and notes for Dutch Oven Sourdough Bread
Understanding your environment
When crafting the perfect Dutch Oven Sourdough Bread, it’s essential to consider your kitchen environment. Factors like humidity, temperature, and elevation can all play a significant role in sourdough fermentation. For instance, if you live in a drier climate, you might need to increase your hydration levels slightly. Trust your instincts—if your dough feels too dry, add a splash more water. Also, ensure that your starter is active and bubbly before you begin; it’s your bread’s best friend!
Tips for flour selection and proofing baskets
Choosing the right flour is crucial for achieving the ideal texture and flavor in your Dutch Oven Sourdough Bread. While bread flour is a popular choice, consider experimenting with a blend of whole wheat or rye flour for more depth. These flours can enhance the sourdough’s flavor profile and give it a nutritional boost, too.
When it comes to proofing baskets, opt for a well-structured banneton. Using one made from cane or rattan will help your dough hold its shape and make a beautiful pattern that impresses at the table. Take care of your banneton by dusting it with flour before use; this prevents sticking and allows for easier release.
For more tips and techniques, check out King Arthur Baking to enhance your baking experience!
Serving suggestions for Dutch Oven Sourdough Bread
When it comes to enjoying your homemade Dutch Oven Sourdough Bread, the possibilities are endless. Let’s explore some delightful serving suggestions that are sure to impress your taste buds.
Pairing with spreads and dips
Nothing complements the tangy flavor of sourdough like a good spread. Try these delicious options:
- Avocado Smash: A simple mash of ripe avocado, lemon juice, and salt makes for a creamy topping.
- Hummus: A garlicky chickpea dip provides a protein-packed punch.
- Cream Cheese with Herbs: Spread a thick layer of herb-infused cream cheese for a savory twist.
These spreads enhance the unique texture and flavor of your Dutch Oven Sourdough Bread, making every bite memorable.
Creative sandwich ideas
Your sourdough also shines as a base for fantastic sandwiches. Why not give these combos a try?
- Turkey Bacon and Avocado: Layer crispy turkey bacon with fresh avocado slices and a hint of lime for a hearty bite.
- Chicken Ham and Spinach: Add chicken ham, a handful of spinach, and a smear of Dijon mustard for a savory treat.
- Caprese Style: Sliced fresh mozzarella, tomatoes, and a drizzle of balsamic vinegar create a fresh, Italian-inspired delight.
Want more sandwich ideas? Check out this guide on easy homemade sandwiches for inspiration! Enjoy experimenting with ingredients that reflect your tastes.
Time breakdown for Dutch Oven Sourdough Bread
Preparation time
Creating your Dutch Oven Sourdough Bread is an experience, and it starts with about 20-30 minutes of active prep time. During this phase, you’ll mix your ingredients, knead the dough, and get it resting for the first rise. You might find it helpful to check out some tips on proper dough handling to make this step smoother.
Baking time
Once your dough has risen beautifully, you’ll spend 30-40 minutes baking it to perfection in the Dutch oven. This method locks in moisture, giving you that crispy crust everyone loves.
Total time
In total, you’re looking at around 12-16 hours for the entire process. Don’t let the timing discourage you! Much of this is passive waiting time for the dough to ferment and rise, which adds flavor and depth to your sourdough delight. Perfect for a weekend project!
For further reading on sourdough fermentation techniques and to deepen your understanding, consider checking resources like King Arthur Baking or The Perfect Loaf for expert insights.
Nutritional facts for Dutch Oven Sourdough Bread
When you indulge in a slice of Dutch Oven Sourdough Bread, it’s not just about the delicious flavor! Here’s a quick breakdown of its nutritional content to help you enjoy this comforting bread mindfully.
Calories
On average, a single slice of Dutch Oven Sourdough Bread contains about 80-100 calories, making it a relatively light yet satisfying option for any meal.
Carbohydrates
This artisanal bread typically has around 15-20 grams of carbohydrates per slice, providing a good source of energy. The complex carbs in sourdough are easier to digest, thanks to the fermentation process.
Protein content
Each slice contributes about 3-4 grams of protein, which is essential for muscle repair and overall health. Pair it with your favorite toppings, like Turkey Bacon or Chicken Ham, for a nutrient-rich boost.
For more insights on sourdough nutrition, you can check out resources from Healthline and American Bakers Association. Enjoy baking and feel good about what you’re eating!
FAQs about Dutch Oven Sourdough Bread
How do I maintain my sourdough starter?
Maintaining your sourdough starter is simpler than you might think! Regular feeding is key to keeping it healthy. Feed it once every 24 hours by discarding half of the starter and adding equal parts water and flour—usually about ½ cup each. Make sure to use a high-quality flour for the best results. For those who aren’t baking every day, you can store your starter in the fridge and feed it weekly. Just remember to bring it back to room temperature and feed it the night before you plan to bake your Dutch Oven Sourdough Bread.
For more detailed tips on starter care, check out King Arthur Baking’s guide.
Why is my bread dense?
A dense loaf can be quite the disappointment, but don’t fret! Here are a few common culprits:
- Under-proofing: Give your dough enough time to rise. The ideal proofing time can vary with temperature, so make sure it doubles in size before baking.
- Too little hydration: Sourdough loves water! If your dough feels stiff, add a bit more water next time.
- Inactive starter: Ensure your starter is bubbly and active. If it’s not, consider reviving it with more frequent feedings.
If you address these issues, you’ll be well on your way to achieving that perfect, airy texture in your Dutch Oven Sourdough Bread.
Can I use different types of flour?
Absolutely! While all-purpose flour works wonderfully for Dutch Oven Sourdough Bread, experimenting with other flours can yield spectacular results. Whole wheat flour and rye flour can add depth of flavor and nutrition. Just remember that different flours absorb water differently, so you may need to adjust your hydration levels. Each type of flour has its own character and can bring something unique to your bread, making your baking journey even more exciting.
Want to explore more about the variety of flours and their uses? Take a look at The Bread Lab’s resources.
Conclusion on Dutch Oven Sourdough Bread
Embrace the Joy of Baking Homemade Bread
Baking Dutch Oven Sourdough Bread is not just about creating a delightful loaf; it’s an experience that nourishes both the body and the soul. The magic lies in the process—watching the dough transform, embracing the enticing aroma wafting through your kitchen, and ultimately enjoying the warm, crusty bread that emerges. It’s a wonderful way to unwind after a busy day, and it offers a delicious sense of accomplishment.
So why wait? Gather your ingredients and embrace this journey. For more detailed information on bread-making techniques and tips, check out The Bread Baker’s Apprentice to deepen your skills. Happy baking!
PrintDutch Oven Sourdough Bread: Easy Homemade Delight for Everyone
Learn to make delicious Dutch Oven Sourdough Bread with this easy homemade recipe that everyone can enjoy.
- Prep Time: 20 minutes
- Cook Time: 45 minutes
- Total Time: 16 hours 5 minutes
- Yield: 1 loaf 1x
- Category: Bread
- Method: Baking
- Cuisine: American
- Diet: Vegetarian
Ingredients
- 3 cups all-purpose flour
- 1 1/4 cups warm water
- 1/4 cup sourdough starter
- 1 teaspoon salt
Instructions
- In a large bowl, mix the flour, water, sourdough starter, and salt until combined.
- Knead the dough for about 10 minutes until it becomes smooth and elastic.
- Place the dough in a lightly greased bowl, cover it, and let it rest for 12-16 hours at room temperature.
- Preheat your oven to 450°F (230°C) with your Dutch oven inside for 30 minutes.
- Shape the dough into a round loaf and let it rise for 30 minutes.
- Carefully place the dough into the hot Dutch oven, cover, and bake for 30 minutes. Remove the lid and bake for an additional 15 minutes until golden brown.
- Let the bread cool on a wire rack for at least 1 hour before slicing.
Notes
- For a crispier crust, place a few ice cubes in the Dutch oven when you first put the bread in.
- This bread can be flavored with herbs or cheese for a unique twist.
Nutrition
- Serving Size: 1 slice
- Calories: 150
- Sugar: 0.5g
- Sodium: 350mg
- Fat: 1g
- Saturated Fat: 0g
- Unsaturated Fat: 0.5g
- Trans Fat: 0g
- Carbohydrates: 30g
- Fiber: 2g
- Protein: 4g
- Cholesterol: 0mg
Keywords: Dutch Oven, Sourdough, Bread, Easy Recipe, Homemade